How to install the Popsixle Shopify app and complete the onboarding process to start your free trial
Important information about Popsixle setup and timing: Popsixle supports a 14-day free trial which starts at the time of app installation, but Popsixle’s data connection will not be “live” on your site until you’ve completed the onboarding process.
Your account will be charged for the Popsixle subscription at 14 days, but you can cancel the trial or subscription support at any time by removing the app in Shopify

Step 1: Install the app
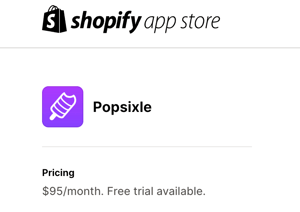
To get started with Popsixle, download and install the Popsixle app from Shopify
https://apps.shopify.com/popsixle
Step 2: Complete the basic onboarding steps in the app
After you’ve successfully installed the Popsixle app, you’ll be led through the steps in the onboarding process, which once completed will allow the Popsxle connection to go live on your site.
The onboarding steps only take about 10 minutes to complete, but remember trial setup is not a separate phase from the 14 days of free Popsixle support. If you’re stuck at any point with a particular step in the process, reach out to our team for assistance via email or the live chat on our site so there’s no delay in your ads benefitting from Popsixle’s better data.
Overview:
Step 1: Install the app
Step 2: Complete basic onboarding
Step 3: Access the dashboard, check account settings and add landing pages
Step 4: Connect Popsixle to your ads in each channel
The onboarding steps:
-
 Account Setup
- Account Information - basic information of your contact info, brand name, site url, and timezone should auto-populate here
 Website Details - you'll need to select your site's type of website and cart/checkout from the two options of either Shopify Standard or Headless/Custom. (If you're not sure, select that option for further assistance)
 Access Agreement - you'll need to agree to the terms to move forward with Popsixle support. If you have any questions about the terms, reach out to our team for help via email or the live chat on our site
- Account Information - basic information of your contact info, brand name, site url, and timezone should auto-populate here
-
Shopify Access
-
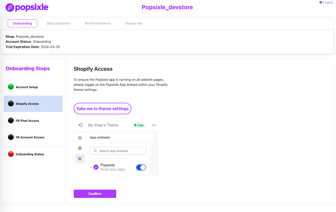
This step will direct you to your Shopify theme settings to toggle Popsixle "on" within the app embed. You'll wan to toggle Popsixle "on" for all actives themes in your library (ie. themes that are being used now or may be used in the future*) and make sure to click the SAVE button on the top right corner of each screen .
-
-
How to toggle Popsixle "on" in your Shopify theme settings:
 From the app, click the button "Take me to theme settings" to get to your Shopify Admin theme settings
- or from the Shopify Admin, go to > Online Store > Themes
- For each theme, hit the button "Customize."
 Once in the theme, look at the on the left-most margin to see the "App Embeds" icon (the 3rd option down, with 3-squares and a plus sign)
- Toggle the Popsixle on, then click the "Save" button in the upper right corner.
- Repeat for all active themes in the Theme Library (being used now, or may be used in the future)
- *Why do I need to toggle Popsixle "on" for all active themes being used now or in the future? If you switch themes in the future and Popsixle is not toggled on for that theme, your site's connection will have only partial data flow
- Why am I seeing a red-flag alert in the app for Shopify Access? A red-flag alert (image below) will appear on your app screen if you do not hit "save" in your Shopify Theme settings, or this step is otherwise incomplete. To clear the alert and proceed with onboarding, check to ensure that Popsixle is toggled "on" for all active themes within the app embed (and hit save!), then refresh the app screen to move forward
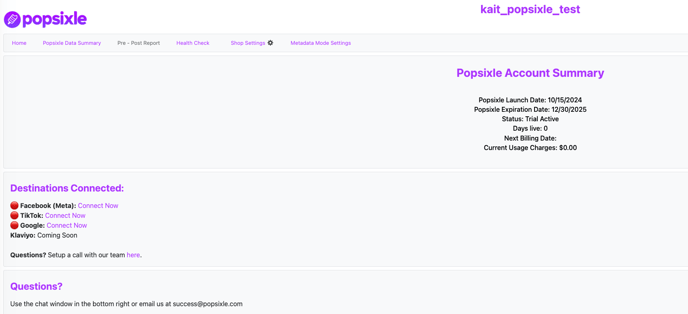
Once the basic onboarding steps have been completed, you can click 'Access Dashboard' to check your settings, add landing pages and connect Popsixle to your ads in Meta, Google and TikTok.

Step 3: Access the dashboard to check your settings and add landing pages
Once in the dashboard, click into Shop Settings > Account Settings to check the information you added to the app.
This is also where you'll need to add information for any landing pages:
If your ads are driving traffic to a domain or landing page other than the main domain connected to your Shopify store, you'll need to take a few additional steps to get Popsixle to track that traffic:
- Add the domain of the landing page to your Domain Settings (you may notice the link will be shortened or lose a backslash, etc.)
- Copy the Landing Page Custom Code Snippet in your Account Settings, then add it to the landing pages you need Popsixle to track (either directly in the body of the page or via GTM or CMS template you are using)
- Reach out to our team via email at success@popsixle.com to let us know you've added the code (be sure to include the domain link in your email) so we can run a check and confirm Popsixle's code is tracking the page

Step 4: Connect Popsixle to your ads in Meta, Google and TikTok

From the dashboard, click "Connect Now" to connect Popsixle to each platform.
You can add or disable each connection at any time during your Popsixle support from your Shop Settings on the dashboard.
Follow the guides below to connect each channel:
Here's what to expect moving forward:
- After the connection has been live for about 48 hours (or two business days) the Popsixle team will run a post-launch Health Check on your account to ensure there are no issues with your setup or connection. We'll reach out to share the results of the report.
- We'll check in periodically during your trial to share updates on performance and accuracy to help you measure the impact of Popsixle's connection. Here are a few resources to support you during your trial:
- Learn more about how to optimize your campaigns for new customers purchases: Optimize your ads to target new customers with Popsixle
- Learn more from Noah's LinkedIn post about how to supercharge the performance of your ads
- Remember your account will be charged for the Popsixle subscription 14 days after installation, but you can cancel the trial or subscription support at any time by removing the app in Shopify (see subscription details: Popsixle App Pricing & Subscription)
Have questions or concerns? Reach out to the Popsixle via email or through the live chat on our site and a member of our team will get back to you within one business day.

