Follow the steps to connect your Popsixle account to Meta so you can optimize your ads
Once you've completed the basic onboarding steps for the Popsixle App, you can connect your account to Meta to optimize ad performance and accuracy
Overview:
Step 1: Add Meta Pixel/Dataset Information
Step 2: Link and share Meta Ad Account Access
Step 3: Turn off data sharing in your Meta-Shopify settings
Step 4: Toggle on Popsixle's Server (and Browser) Events
Step 5: Check Events Manager for event verification & Allow/Block Lists
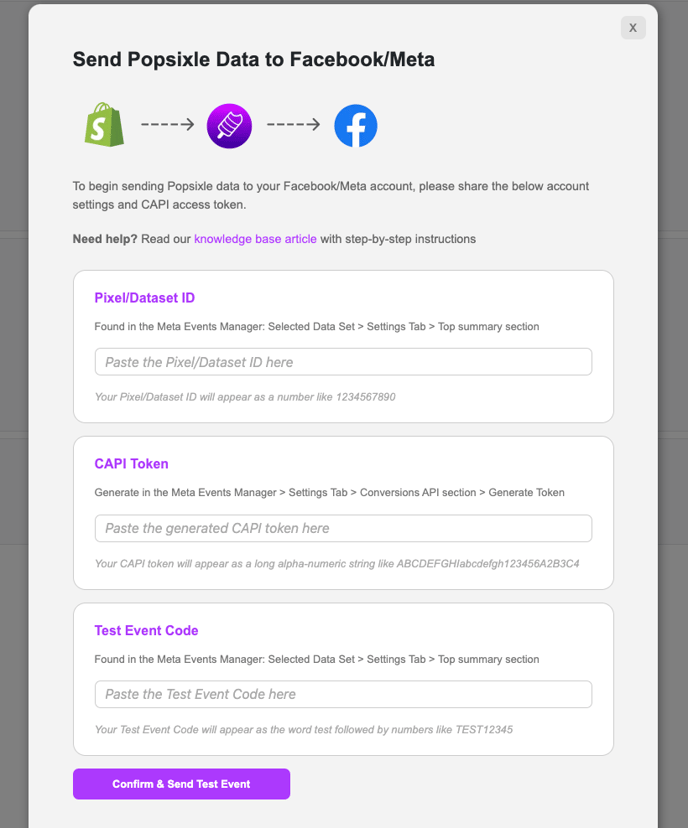
Step 1: Add Meta Pixel/Dataset Information
-
-
You'll need to locate your account's Pixel/Dataset ID, Conversation API (CAPI) token and Test Event Code and add the information to the app
- Follow the guide to obtain this information from Meta Events Manager: Onboarding with Popsixle: Facebook pixel/dataset
- Once you've added that info to the app, click "Confirm & Send Test Event" to check the connection
-
Step 2: Link and share Meta Ad Account Access
Connecting your Meta ad account to the app can enable a display of reporting accuracy and performance data on the dashboard. If you do not connect an ad account, there will be no data in the Pre/Post or Attribution Accuracy reports.
 This is a two step process -- you'll first need to share view/read only access to each of your your site's Facebook ad accounts, then link the accounts to the app to move forward.
Note that you will need admin access to your brand's ad account to share access with Popsixle (Popsixle is not able to connect to personal ad accounts).
- Share access to your ad account(s) by following the steps in this guide: Onboarding with Popsixle: Facebook ad account access
- Link your Facebook ad account (s) to the Popsixle App settings: Click "Update" and add the account ID for each ad account
Step 3: Turn off data sharing
Make sure Popsixle is the only data connection supporting your campaigns:
- Turn off data sharing in your Meta-Shopify settings by following the steps in our guide: How to turn off data sharing in Shopify
- Turn off all other CAPI/server-side connections like Trackify, Sonar, Elevar, Hyros, Wicked Reports, etc to prevent the data risks that can come from using extra data connections during Popsixle, like over-counting in Events Manager and misattribution in Ads Manager. See more info here.
Step 4: Toggle on Popsixle's Server (and Browser) Events
- Once the pixel/dataset has been connected, you can toggle on Server
 Events as the final step in connecting Meta to your account
 - DO NOT TOGGLE ON BROWSER EVENTS UNLESS DATA SHARING HAS BEEN TURNED OFF IN SHOPIFY ^
- Turing on browser events while Shopify's data sharing is still on will lead to double-counting in Meta Events Manager and misattribution in Meta Ads Manager. See more info in the guide: How to turn off data sharing in Shopify
- If data sharing is off according to the steps in our guide, go ahead and toggle on browser events to enable our fully-aligned server and browser events for best-possible data accuracy
When the process is complete, our team will run a few checks to ensure a successful connection. Look out for an email from our team that will either confirm Popsixle is live with Meta or provide you with direction for any outstanding action needed.
Step 5: Important! Check Events Manager for event verification & Allow/Block Lists
Once you have successfully connected Meta with Popsixle, you'll need to take two actions in Meta Events Manager to enable your pixel to accept Popsixle's events:
 Verify Popsixle's events
- Look at the Overview page in Events Manager to see all the events sent to Meta.
- Check for any red triangle-shaped alerts next to your events. When you hover your cursor over these alerts, you'll see the direction: "The custom event isn’t verified. Have someone with full control permission verify the event so you can use it."
- You (or someone on your team will full control permission) will need to click the red alerts, then click the "Manage Status" button that follows to accept/verify the event.
- Check (and update) an Allow list
- Look at the Settings page in Events Manager and scroll down to see if your account has created an "Allow List"

- If there's no list created, there's no problem and no action needed (do not "Create" a new list!)
- If there IS an Allow List, make sure these 2 domains are included in the list (or click "Edit" to add the domains):
- pop6serve.com
- your site's own Shopify url
- If there's no Allow List but there is a Block List, check to ensure the two domains above are NOT added to the list. Domains added to the block list will be blocked from sending events to Facebook. Domains not on the block list will be allowed to send events.
- Look at the Settings page in Events Manager and scroll down to see if your account has created an "Allow List"
Have questions or concerns? Reach out to the Popsixle via email or through the live chat on our site and a member of our team will get back to you within one business day.